

So, I decided to sew a race track. Any questions on that? My son brings die-cast cars everywhere, and I think he'll like this. I got the idea from Homemade by Jill and her fantastic tutorial (found here). I combined it with Mr Monkeysuit's tutorial that I used for the art caddies, and upgraded the road to a race track. This awesome jacket also gave me inspiration, you have to check it out. Scroll down and you'll see it, it's a jacket with a secret car play mat inside! Fabulous.


I like the way it turned out, and I feel that this blog really makes me get out of my comfort zone. I am not great at sewing, this was the very first applications I've ever made. It's not perfect but it works. And it was really fun to make.

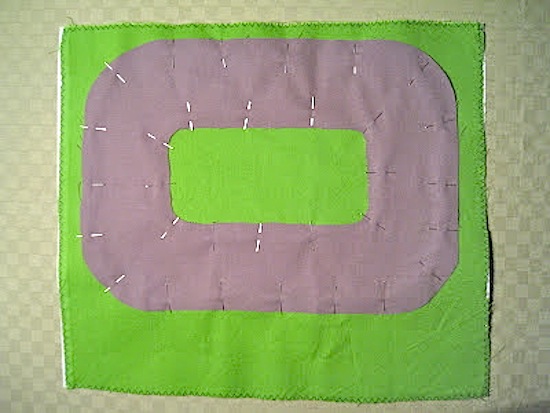
I also added one sheet of interfacing fabric. This is optional and depends on how sturdy your cover fabric is. The race track is 14,75" (37 cm) x 10,5" (27 cm). No sewing allowance on the race track! The track itself is 3,5" (9 cm) wide to fit two racing cars.

Pin the pockets to the lining fabric. Make the small car pockets by sewing one seam every 2,5" (6,5 cm). I made sure to go back an forth a few times at the opening of the pocket to reinforce it.
I you want to decorate the cover fabric with an application (I made the green car from Jill's template), this is when you attach it. Also attach the velcro.
Assemble the caddy like this: First the interfacing fabric, then the lining (the green fabric) right side up with the pocket right side up. Carefully place the tape lenghtways above the pockets to that 0,5" sticks out to the right. I'm sorry I don't have any pictures of this step (Mr. Monkeysuit does, though).
Carefully place the cover fabric on top, right side down. Pin around the edges, leaving a 3" gap at the top. Pin the tape in place with a few extra pins. Sew it together, and trim the edges. Turn right side out through the 3" gap. Hand sew the gap closed. Trim threads and press. Done!

Summary in Swedish: Jag har sytt en bilbana. Vad gör man inte för sina barn? Särskilt inte de som tar med sig leksaksbilar överallt. Detta bilfodral var roligt att sy, och jag fick överkomma min rädsla för att sy applikationer. Vilken sorts fodral tycker ni jag ska sy härnäst?
Vad duktig du är du med. Önskar dig en riktigt fin syföreningskväll/Gela
ReplyDeleteJättefint bilfodral. Och smart förvaring.
ReplyDeleteBåde legofodral och virknålsfodral vore spännande att se :)
I love this! Great job!
ReplyDeleteWhat is the full size of yours? Thanks!
ReplyDeleteWallace Family: The full size is 16 x 14 inches (40,5 x 35,5 cm), and the car pockets are each 2,75 (wide) x 2,5 inches. The race track alone is 14,75 x 10,5 inches (37,5 x 27 cm) approximately.
ReplyDeletePlease let me know if you have more questions!
Thank you!!
ReplyDelete